
A jewelry saw is a pretty special tool. Its blade is so thin it can be tough to see which way the teeth are pointing so I do it by feel. But that fineness is what enables you to create amazing detail. The first thing I attempted was the state of Michigan (just the lower peninsula) about 3 inches tall from a piece of 18 gauge aluminum. I couldn't believe how good it looked and how quickly I finished it. I was hooked. Turns out it was dumb luck that I chose a project and materials that made it deceptively easy. Aluminum is very easy to cut. I found out later that thick metal I used is much easier to cut because it's stable and doesn't bounce around as you push the saw against it. Now the shape may seem intimidating but as I learned on my next project, it is so much easier to create organic flowing lines with a saw rather than straight lines or symmetrical designs. Any tiny variation on the latter is immediately obvious. If I was off a tat on part of Michigan's uneven shoreline I just curved back the other way and nobody was any the wiser. And finally the size was ideal. Past a certain point, the smaller your finished product the harder it is to cut in all your tiny details. For example, the bronze Michigan on the bottom left is less about 3/4 inch tall and was much tougher to cut. And of course, past a certain point, the larger it is the more unwieldy it is and the longer it takes to navigate with that tiny blade.
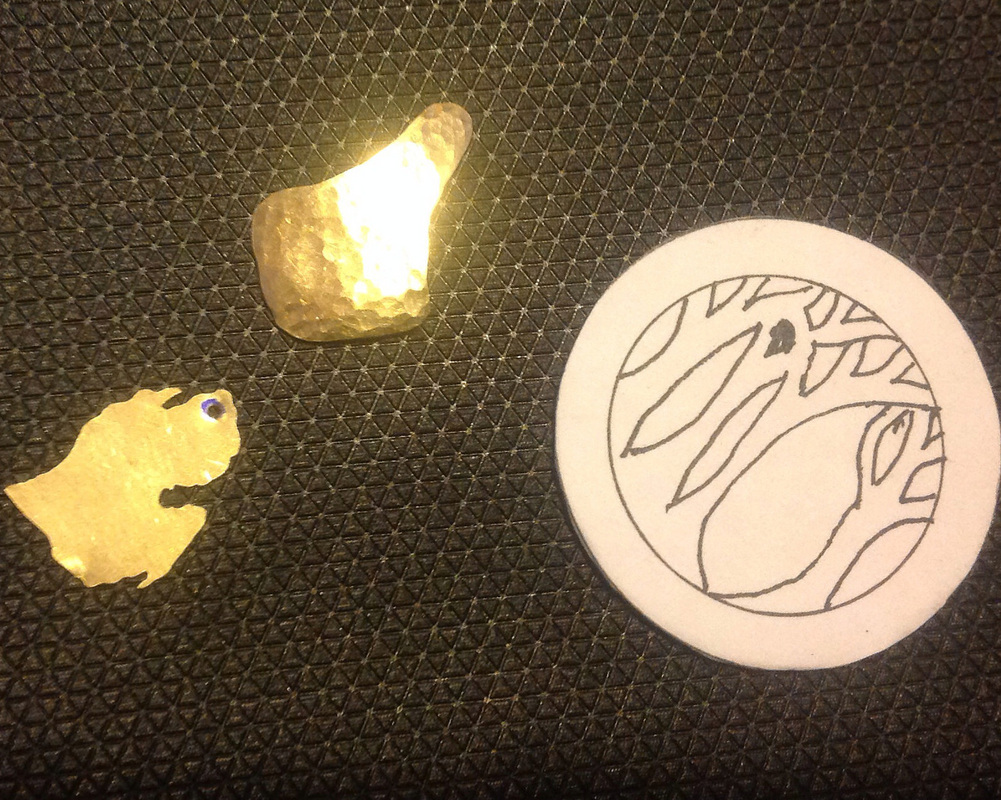
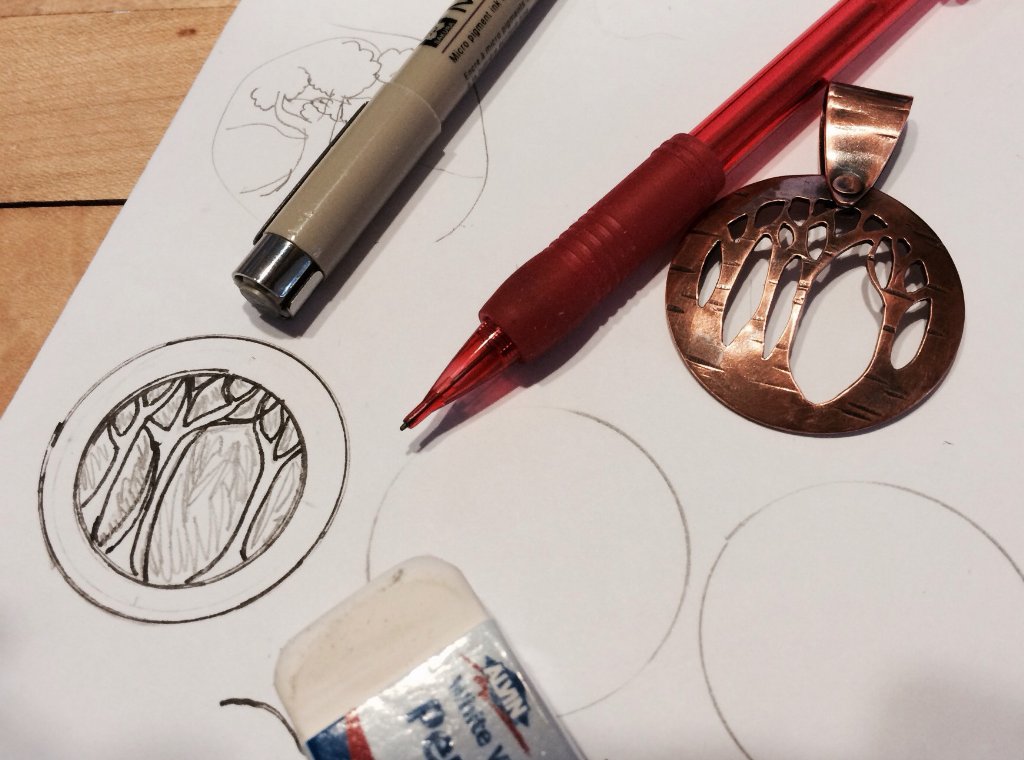
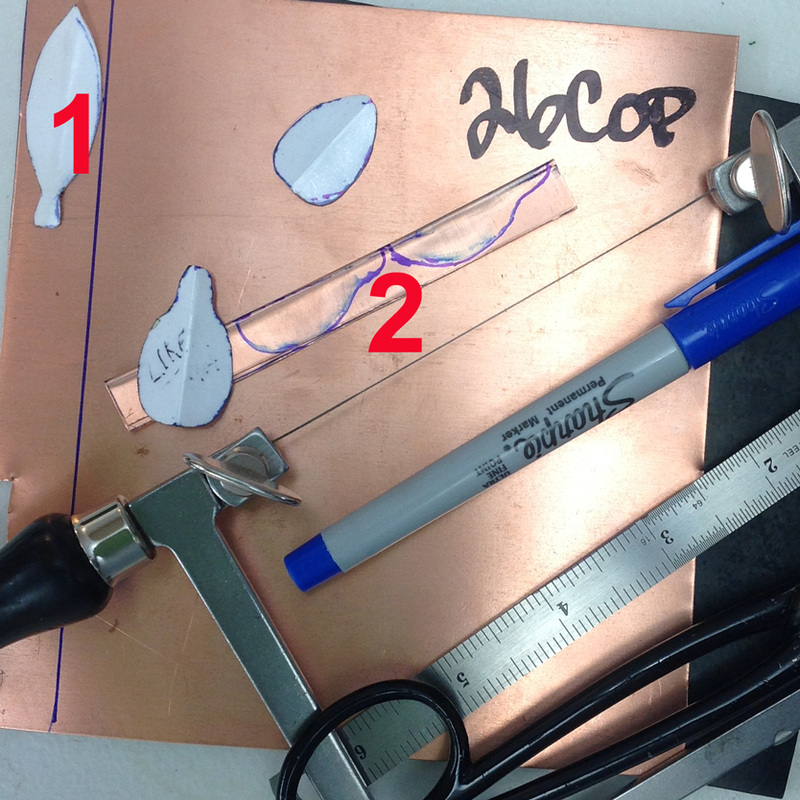
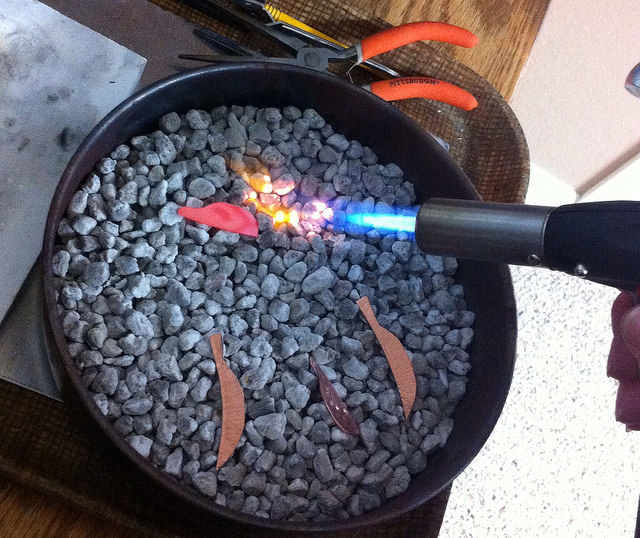
Something I'll be comparing in posts about metal sawing is different ways to get your design on the metal. With each project I tried a new method and I'll detail others in future posts. Each seemed to have its own pros and cons. Here I hand drew the design on a piece of paper. When I was happy with it I cut it out and rubber cemented it to a circle of copper. You need to make sure the cement is totally dry before you begin or it can goop up your saw and/or move around as you work. If you want to create your own design, I'd say the wait time is the only down side of this method. You can also use double-sided carpet tape or a glue stick. I had trouble with the edges coming up when I tried a glue stick but I read about people liking them so maybe I'm doing something wrong.
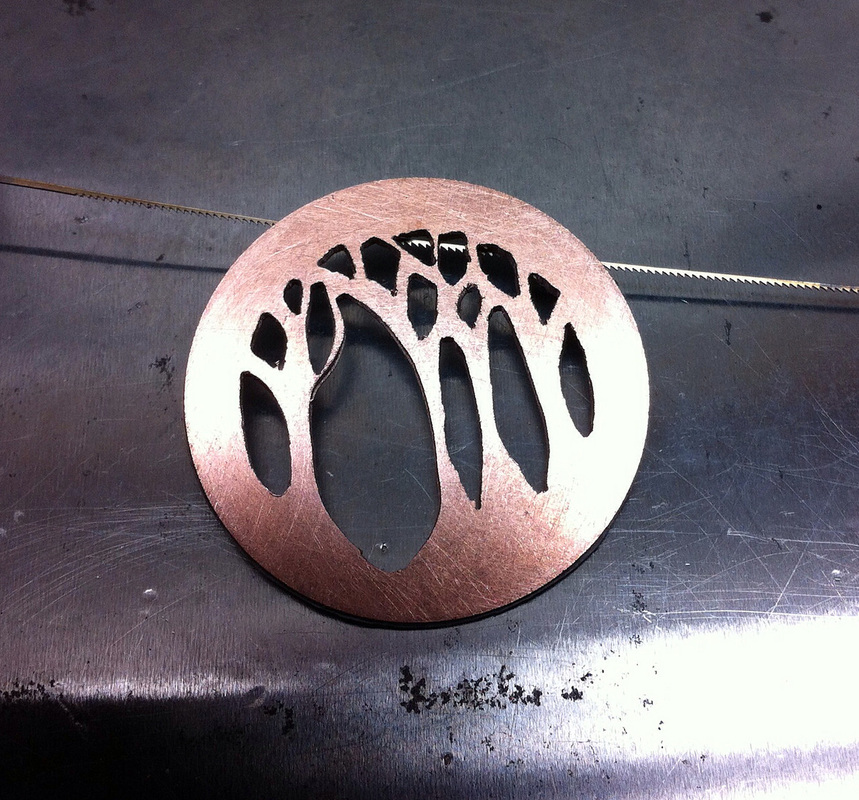
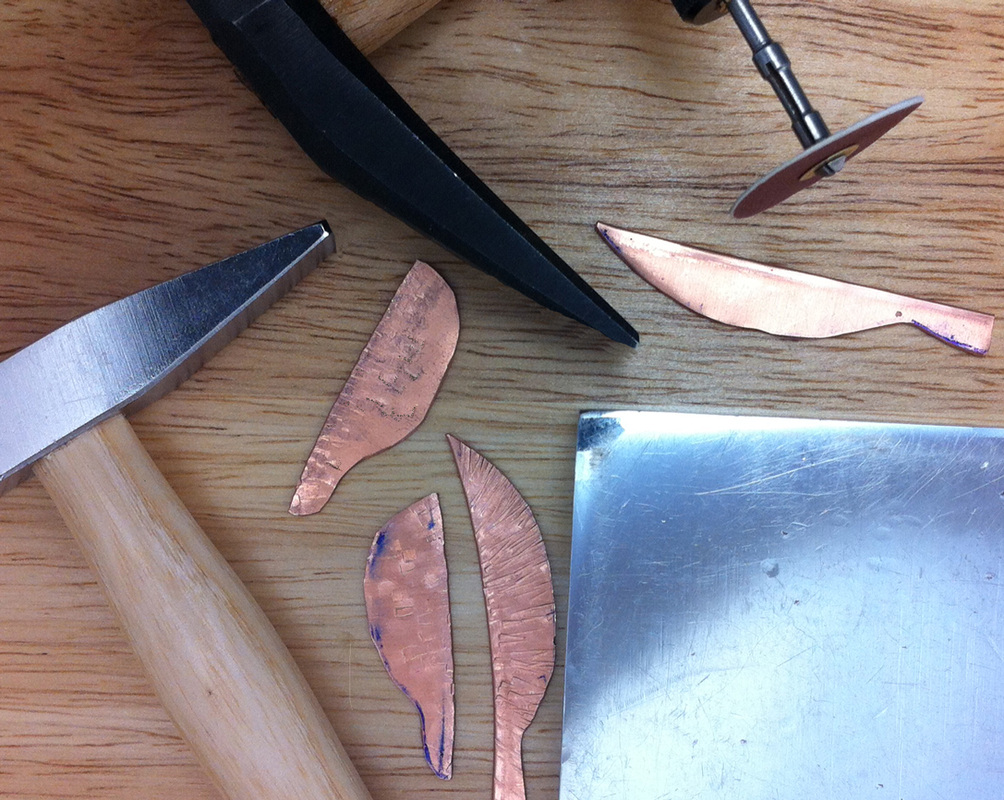
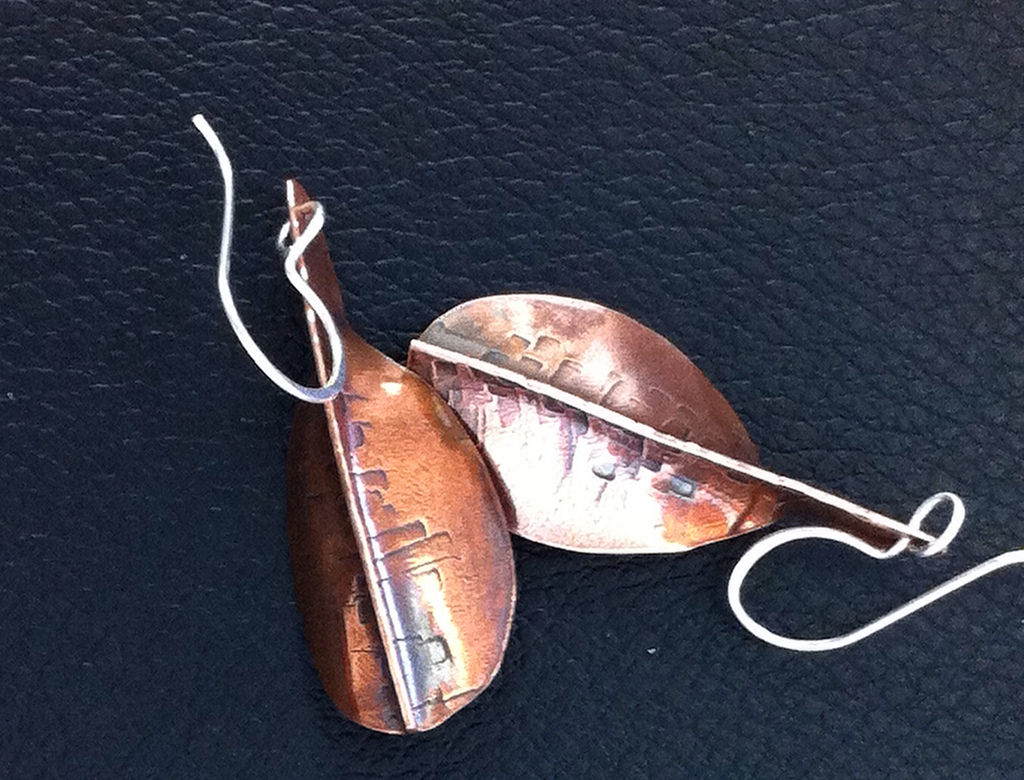
The middle picture shows the design cut out and the paper template removed, but there is still a lot of filing and sanding ahead to smooth all those edges. I was dismayed to discover this takes a lot longer than the actual cutting. The good news is that I've since learned ways to create designs that are more efficient for filing, have some handy new tools, and practice helps a lot.
This was my first sawing project that involved piercing. That is, not just sawing around an edge (like the Michigan earrings) but a design that has holes in the interior. The secret is drilling little holes wherever you need to remove metal. Then you detach one end of your saw blade and slip it through the recently drilled hole, reattach it to your saw frame, and start sawing. For each separate area you repeat the process. It's a little tricky but fun and oh so rewarding.
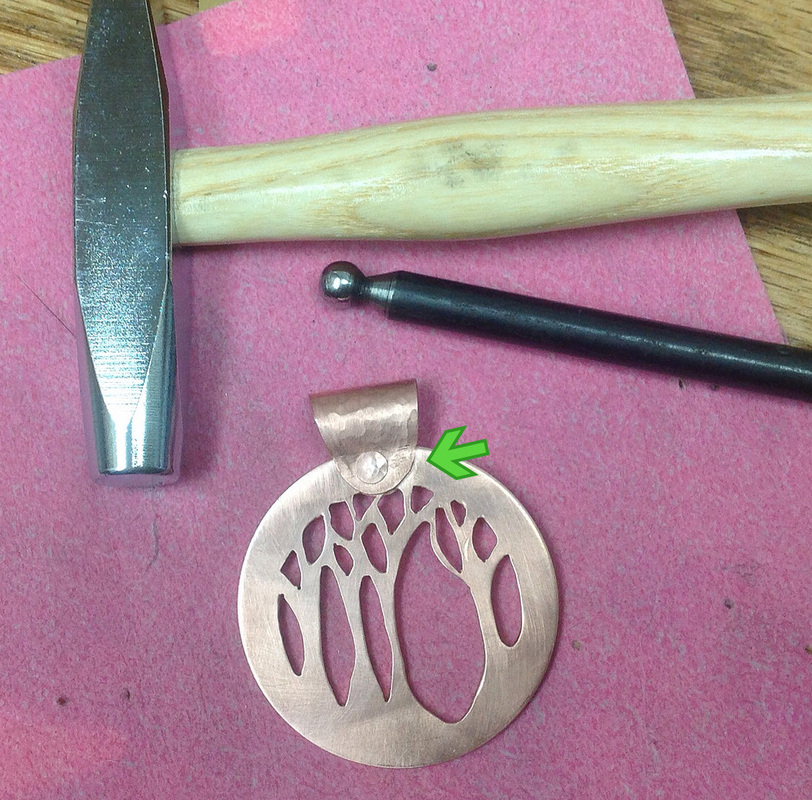
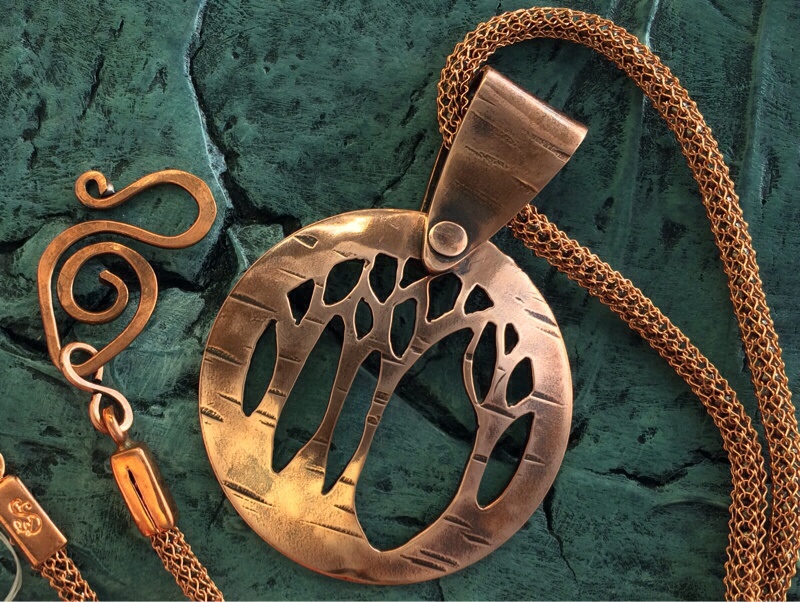
After finishing my filing and polishing, then attaching my handmade bale with a rivet, I thought I was just about done in the picture on the right. Then I noticed how far off to the left my rivet had traveled during the attachment process (see the green arrow). Turns out it was just the first of three bales that I put on and then cut off this pendant. It took many more problems with several more pendants/bales before I finally discovered 3 separate issues that were contributing to my wonky rivet problem. I was going to explain them here but frankly, the memories are still too painful. Usually I'm having big fun when I'm trying new things in the studio - but occasionally I'm contemplating mayhem with perhaps just a little murder thrown in, too.
In retrospect I'm glad I wasn't finished when I thought I was. Besides the wonky rivet I was disappointed in the piece. I first drew a tree silhouette in the middle of circle waaaay back in college and loved it. (It was for an environmental paper and I recall the professor suggesting I could have gotten an A on it if I'd spent a little less time on the cover picture and a little more time on my footnotes. Pish - where were that man's priorities ?!) That combo has stayed close to my heart and I've attempted to recreate it in several mediums since. I'd been itching to try it in sheet metal and figured when I finally learned how, it would be pretty thrilling. I'd put in lots of work and learned a lot but when I looked at it I just felt ... meh. That's where the third part of my title comes in: Finishing Details. It was while I toiled on the bale issues that the pendant told me it needed to be domed, smooth finished, antiqued, and textured. (Wish it had told me it needed to be domed before I finally got a bale properly attached - would have been a lot easier.) Here are the results above and below. As usual, you can click on any picture for a larger view.
The middle picture shows the design cut out and the paper template removed, but there is still a lot of filing and sanding ahead to smooth all those edges. I was dismayed to discover this takes a lot longer than the actual cutting. The good news is that I've since learned ways to create designs that are more efficient for filing, have some handy new tools, and practice helps a lot.
This was my first sawing project that involved piercing. That is, not just sawing around an edge (like the Michigan earrings) but a design that has holes in the interior. The secret is drilling little holes wherever you need to remove metal. Then you detach one end of your saw blade and slip it through the recently drilled hole, reattach it to your saw frame, and start sawing. For each separate area you repeat the process. It's a little tricky but fun and oh so rewarding.
After finishing my filing and polishing, then attaching my handmade bale with a rivet, I thought I was just about done in the picture on the right. Then I noticed how far off to the left my rivet had traveled during the attachment process (see the green arrow). Turns out it was just the first of three bales that I put on and then cut off this pendant. It took many more problems with several more pendants/bales before I finally discovered 3 separate issues that were contributing to my wonky rivet problem. I was going to explain them here but frankly, the memories are still too painful. Usually I'm having big fun when I'm trying new things in the studio - but occasionally I'm contemplating mayhem with perhaps just a little murder thrown in, too.
In retrospect I'm glad I wasn't finished when I thought I was. Besides the wonky rivet I was disappointed in the piece. I first drew a tree silhouette in the middle of circle waaaay back in college and loved it. (It was for an environmental paper and I recall the professor suggesting I could have gotten an A on it if I'd spent a little less time on the cover picture and a little more time on my footnotes. Pish - where were that man's priorities ?!) That combo has stayed close to my heart and I've attempted to recreate it in several mediums since. I'd been itching to try it in sheet metal and figured when I finally learned how, it would be pretty thrilling. I'd put in lots of work and learned a lot but when I looked at it I just felt ... meh. That's where the third part of my title comes in: Finishing Details. It was while I toiled on the bale issues that the pendant told me it needed to be domed, smooth finished, antiqued, and textured. (Wish it had told me it needed to be domed before I finally got a bale properly attached - would have been a lot easier.) Here are the results above and below. As usual, you can click on any picture for a larger view.
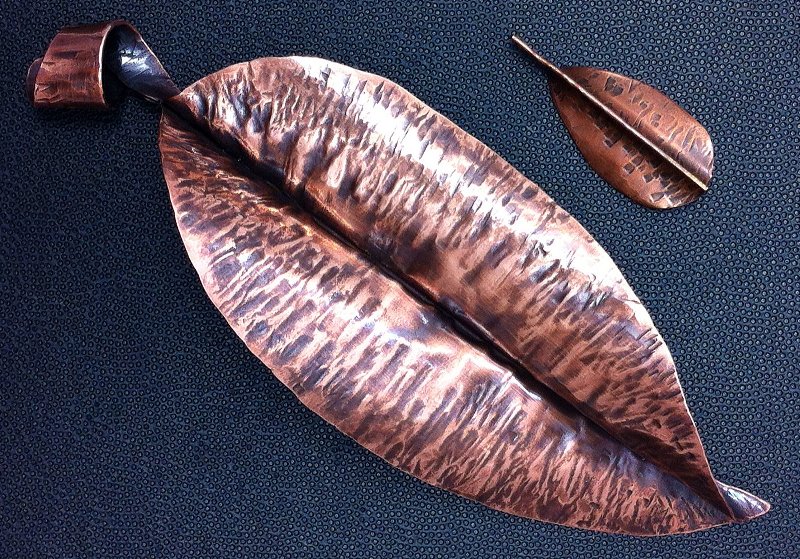
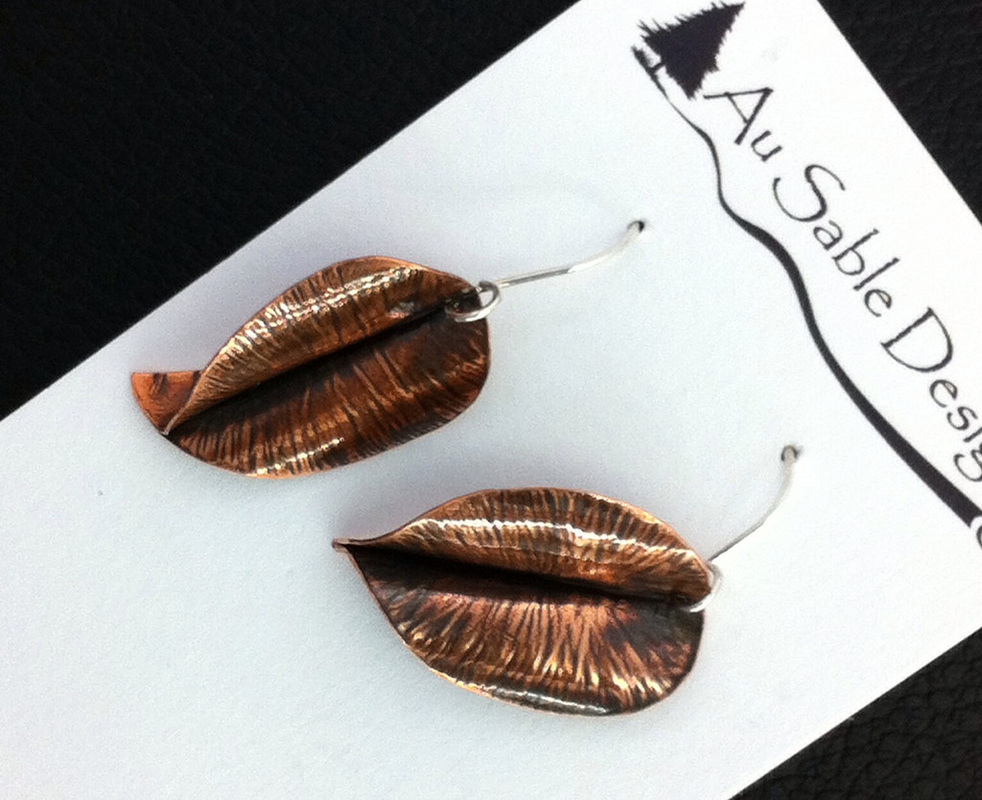
What a difference! It may not seem like it to someone else, but for me the changes took me from a disappointed "meh" to an excited and satisfied buzz. The longer I work with metal, the more techniques I learn, and the more natural it seems to know what a piece needs - to give me that buzz anyway. There are a multitude of finishing detail techniques to learn about in the world of metal and I'm thoroughly enjoying adding each new one to my skill set.
This piece moved to my wall at the gallery (AuSable Artisan Village Gallery & Art Center) and sold a few months ago. I was actually a little sad when I saw it was gone. We'd been through a lot together. I hope it went to a good home and I'm glad I took pictures to remember the experience.
This piece moved to my wall at the gallery (AuSable Artisan Village Gallery & Art Center) and sold a few months ago. I was actually a little sad when I saw it was gone. We'd been through a lot together. I hope it went to a good home and I'm glad I took pictures to remember the experience.

 RSS Feed
